
you that I don't have any secret and I am definitly not a photoshop guru and everything I do
is pretty simple and basic. I do not have any pattern to process my pictures, but I use
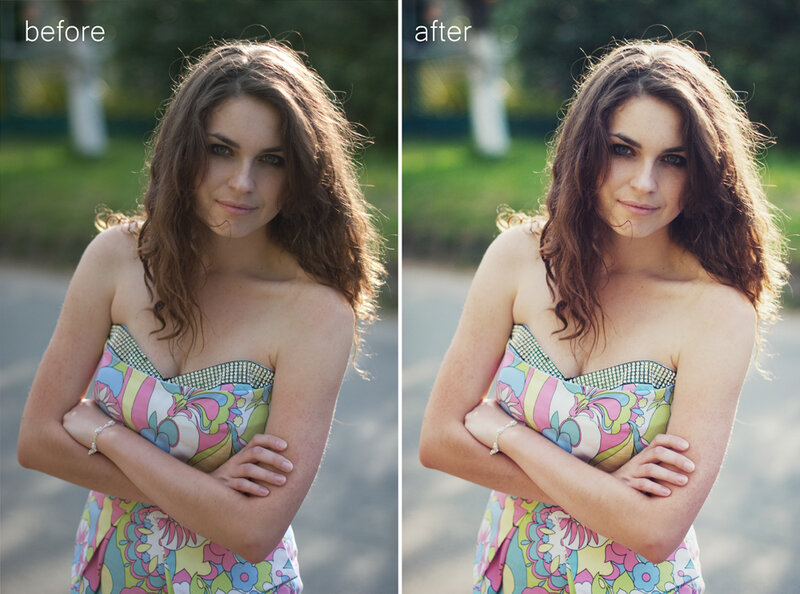
Alien Skin Exposure 3 a lot, so here's one of the ways you can use it.
Unfortunatly my photoshop is in russian but I think it's easy to guess what is what for frequent users.
1. Make a background copy.
2. Go to Exposure 3 - Color films- Slide - Kodak Ektachrome mid-1970s(blue).
3. Editi it like you see in a video.
4. Then go to Color Balance - edit like you see in a video.
5. Go to Layer - New solid layer - Color. Name it and choose mode: Exclusion .
6. Choose a dark blue color.
7. Change the opacity of the layer.
8. Do the same thing with a grey color - then change the opacity.
9. Go to Brightness \ Contrast and add both a little bit like u see in a video.
10. Then go to Gradient - choose orange and dark blue - change the mode to Soft Light -
change the opacity.
11. Go to Curves and creat a curve like u see in a video.
That's it! Hope it was useful for you guys.
Here is the screencast of the tutorial which will help you to follow the workflow.
music: I Am Arrows , Nice try.
The tutorial is amazing, Iryna!! I have heard about Alien Skin but never tried it, definitely going to download it!! But I like how you do not get stuck to Alien Skin, you also give your personal touch!! Really like it!!!
ReplyDeleteThank you,Andrea :) You're never too
Deletetired to leave me a comment :)
<3 u!
This comment has been removed by the author.
ReplyDelete